Generating Documentation for TypeScript Projects
Documentation for JavaScript projects has traditionally been generated via annotations inserted as code comments. While this gets the job done, it seems far from ideal. In this post, I’ll explore how to use TypeScript to generate documentation from source code alone.
TypeScript is JavaScript with optional types. Here’s a simple example:
// Sends some data to some analytics endpoint
function sendAnalyticsJS(data) {
  if (typeof data.type !== 'string') {
    throw new Error('The `type` property is required')
  }
  navigator.sendBeacon('/beacon', JSON.stringify(data))
}
// Results in run-time error
//    The `type` property is required
sendAnalyticsJS({ foo: 'bar' })
The JavaScript code will result in a run-time error. This is fine if the developer catches it early, but it would be better if the developer were warned as the bug was introduced. Here’s the same code written using TypeScript:
// Describe the shape of the data parameter
interface IAnalyticsData {
  // Type is required
  type: string
  // All other fields are fair game
  [propName: string]: string
}
// We don’t particularly need the data.type check here since
// the compiler will stamp out the majority of those cases.
function sendAnalytics(data: IAnalyticsData) {
  if (typeof data.type !== 'string') {
    throw new Error('The `type` property is required')
  }
  navigator.sendBeacon('/beacon', JSON.stringify(data))
}
// Results in compile-time error:
//   Argument of type '{ foo: string; }' is not assignable to
//   parameter of type 'IAnalyticsData'.
//   Property 'type' is missing in type '{ foo: string; }'.
sendAnalytics({ foo: 'bar' })
These annotations are all optional and the more you add, the more the compiler can help you. Compiling the TypeScript version results in code equivalent to the first example. The only difference is that the developer is warned about an error while writing the code.
With TypeScript, JavaScript developers are given powerful tools that aid the development of applications, large and small. Anders Hejlsberg, lead architect of C# and core dev for TypeScript, describes the language as, “JavaScript that scales.”

Using TypeScript means you can:
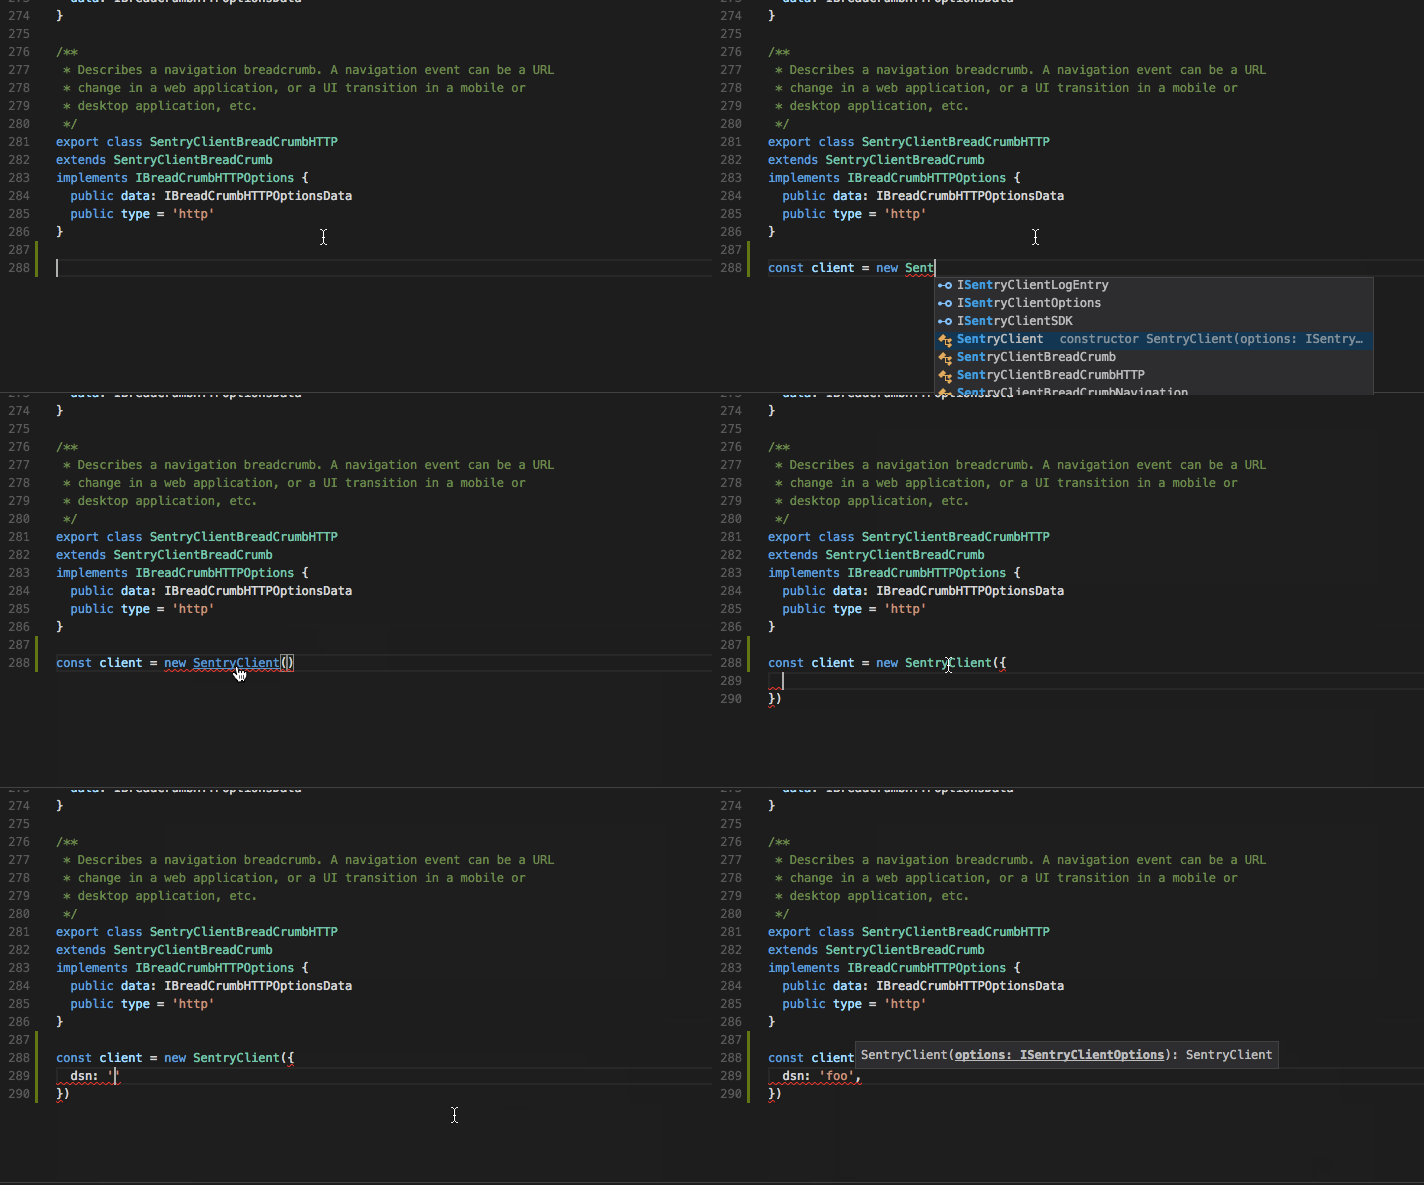
- Interactively explore library interfaces from your text editor
- Enjoy useful auto-completion
- Use good refactoring tools
- Navigate your codebase via the ontology that describes it (by that, I mean jumping to class and interface definitions, modules, etc. from individual instances/references)
- And most importantly to this post, generate documentation that’s tightly coupled to your codebase.

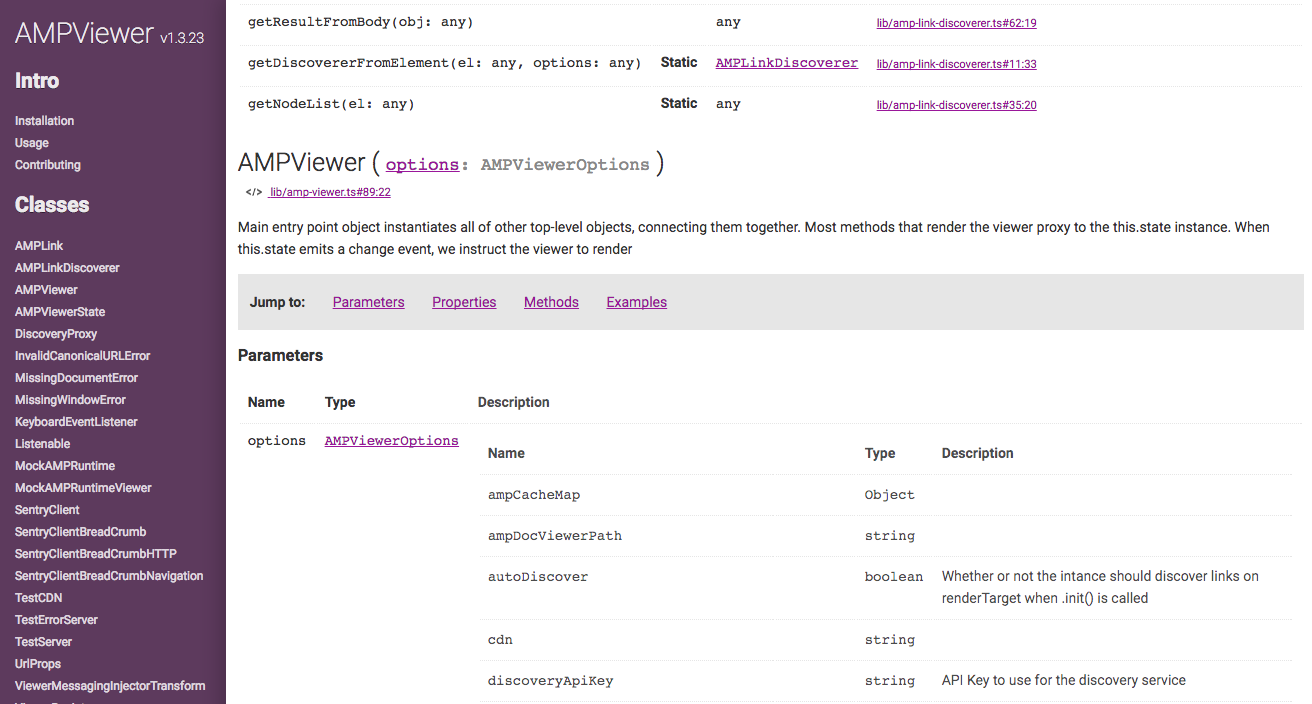
The screenshot above is of the generated documentation from a TypeScript project at Cloudflare.
Why not JSDoc?

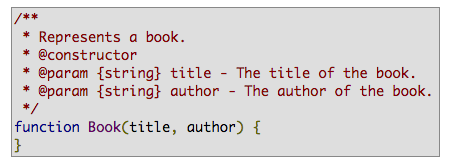
The amount of work required to annotate source code with JSDoc comments is comparable to adopting TypeScript annotations. However, JSDoc comments are not tightly coupled to the codebase, so when the code changes, an independent change of the JSDoc comment is also required. Contrast to TypeScript where the structure is gleaned directly from the source. Here’s a side-by-side comparison between JSDoc and TypeScript:
JSDoc
/**
 * A class representing a point
 * @class  Point
 */
class Point {
  /**
   * Create a point.
   * @param {number} x - The x value.
   * @param {number} y - The y value.
   */
  constructor(x, y) {
    /**
     * The x coordinate
     * @name  Point#x
     * @type {number}
     */
    this.x = x
    /**
     * The y coordinate
     * @name  Point#y
     * @type {number}
     */
    this.y = y
  }
  /**
   * Get the x value.
   * @return {number} The x value.
   */
  getX() {
    return this.x
  }
  /**
   * Get the y value.
   * @return {number} The y value.
   */
  getY() {
    return this.y
  }
  /**
   * Convert a string containing two comma-separated numbers into a point.
   * @param {string} str - The string containing two comma-separated numbers.
   * @return {Point} A Point object.
   */
  static fromString(str) {
    const args = str.split(',').map(arg => +arg)
    return new Point(args[0], args[1])
  }
}
TypeScript
/** Class representing a point. */
class Point {
  /** The x coordinate */
  public x: number
  /** The x coordinate */
  public y: number
  /**
   * Create a point.
   * @param x - The x value.
   * @param y - The y value.
   */
  constructor(x: number, y: number) {
    this.x = x
    this.y = y
  }
  /**
   * Get the x value.
   */
  getX() {
    return this.x
  }
  /**
   * Get the y value.
   */
  getY() {
    return this.y
  }
  /**
   * Convert a string containing two comma-separated numbers into a point.
   * @param str - The string containing two comma-separated numbers.
   */
  static fromString(str: string): Point {
    const args = str.split(',').map(arg => +arg)
    return new Point(args[0], args[1])
  }
}
The above code sample was taken from the JSDoc documentation and adapted for use with TypeScript.
The annotations for TypeScript are much more compact, they’re syntax-highlighted, and most importantly, if something is wrong, the compiler lets us know. Long-form descriptions of things are still made in comments, but the type information has been moved into language semantics.
The downside to adopting TypeScript is the large amount of work required to fit the build tools into your current processes. However, we won’t focus on the nitty-gritty details of build tools since the ecosystem is rapidly changing.
Using TypeDoc
At Cloudflare, we use a tool called TypeDoc to help build documentation. It’s set up such that documentation-generation is on watch and will re-build on codebase changes. Anybody hacking on the project will always have up-to-date docs at localhost:3000/docs.
If you’re using TypeScript 2.x, use the following command to install TypeDoc for your project:
npm install --save-dev https://github.com/DatenMetzgerX/typedoc/tarball/typescript-2-build
Otherwise, for prior versions of TypeScript, you can install straight from NPM:
npm install --save-dev typedoc
From within your project directory, run the following command:
# Change the --out flag to wherever you’d like the output to be stored
./node_modules/.bin/typedoc --out dist/docs --mode modules .
You should see a bunch of HTML documents generated. One for each class and module.
dist/docs
├── assets
│   ├── css
│   │   ├── main.css
│   │   └── main.css.map
│   ├── images
│   │   ├── icons.png
│   │   ├── icons@2x.png
│   │   ├── widgets.png
│   │   └── widgets@2x.png
│   └── js
│       ├── main.js
│       └── search.js
├── classes
│   ├── _src_my_class.html
│   └── ...
├── globals.html
├── index.html
├── interfaces
│   ├── _src.my_interface.html
└── modules
    ├── _src_my_module_.html
    └── ...
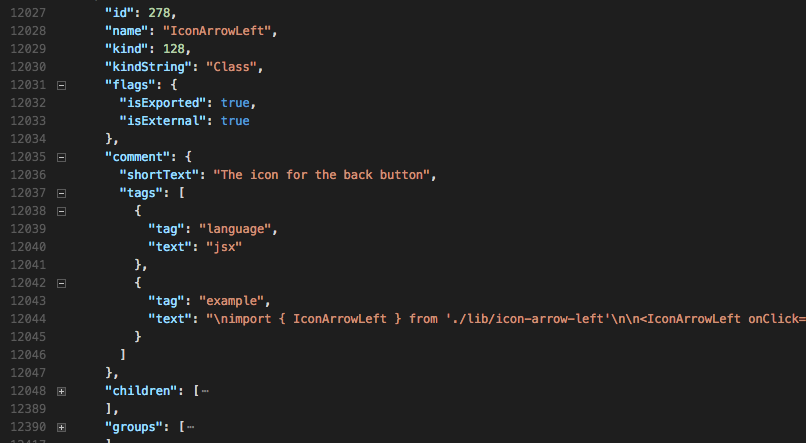
I wanted to build something akin to Lodash’s documentation (a beautiful single page API reference with examples and links to source code). Luckily, you can use TypeDoc’s –json flag to produce a set of useful descriptions of your codebase in JSON format.
./node_modules/.bin/typedoc --json dist/docs.json --mode modules
Note: In order to use the –json flag, you’ll need to setup a proper tsconfig.json for your TypeScript project.

With this high-level, structured description of our code base, we can render any HTML we’d like with a few scripts and a templating language like Handlebars. Here’s a simple script to render a list of code base modules:
const fs = require('fs')
const hbs = require('handlebars')
const project = require('./dist/docs.json')
// The HTML template to use for our simple docs
const tmpl = `
<!DOCTYPE HTML>
<html>
  <head>
    <title>My Project Documentation</title>
  </head>
  <body>
    <h1>Modules</h1>
    <ul>
    {{#each project.children}}
      <li>{{this.name}}</li>
    {{/each}}
    </ul>
  </body>
</html>
`
// Compile the template with handlebars using our project
// object as context key
const result = hbs.compile(tmpl)({ project })
fs.writeFileSync('dist/docs.html', result)
While this means that there is a lot of work up front to create a template that suits the needs of this particular code base, I hope to use the same infrastructure for TypeScript projects at Cloudflare moving forward.
More Than API Reference
TypeDoc gets us halfway there. It provides a structured and automated way to create reference material that is always in sync with our codebase; but we can do more than reference material. Suppose you’re writing a getting-started.md file. You might say something like this:
To get started, call the `viewer.init()` method.
Since we’re using TypeDoc and Handlebars, we can assume we have all the information necessary to actually link to the source code. That might look something like this:
{{!-- Pull the AMPViewer class into scope --}}
{{#Class "AMPViewer"}}
{{!-- Pull the init member from AMPViewer into scope --}}
{{#Member "init"}}
{{!-- Link viewer.init(...) to its location in the source code --}}
{{!-- Also, if the function signature of the .init() method ever changes, --}}
{{!-- it will be reflected here --}}
To get started, call the
`viewer.[init({{> signature signature=signatures.0}})]({{getSourceURL this.sources.0}})`
{{/Member}}
{{/Class}}
While the above looks arcane, it’s just Markdown and Handlebars. The template contains a block helper called Class that will pull the AMPViewer class object into the current scope. Then using the AMPViewer class, we pull the init member into the current scope. We use the {{> signature}} partial to pretty-print the function’s signature and the getSourceUrl helper to link to this method in the source code.
If the source code changes, our docs update too.
Open Source and Beyond
Over next couple of months, we’ll be open sourcing the tools we’ve created to generate our documentation. We’ll also open source the theme shown in this post so you can generate docs without worrying about the styling. We hope to create a rich TypeScript ecosystem and to have fantastic documentation for all of our projects.
If you’re thinking of generating documentation by annotating your source, use TypeScript instead and enjoy the benefits.
source

